Animate
Animating
Keyframes, easing, motion paths, loops, parenting and the timeline — the machinery every animation in Kreativus rides on.
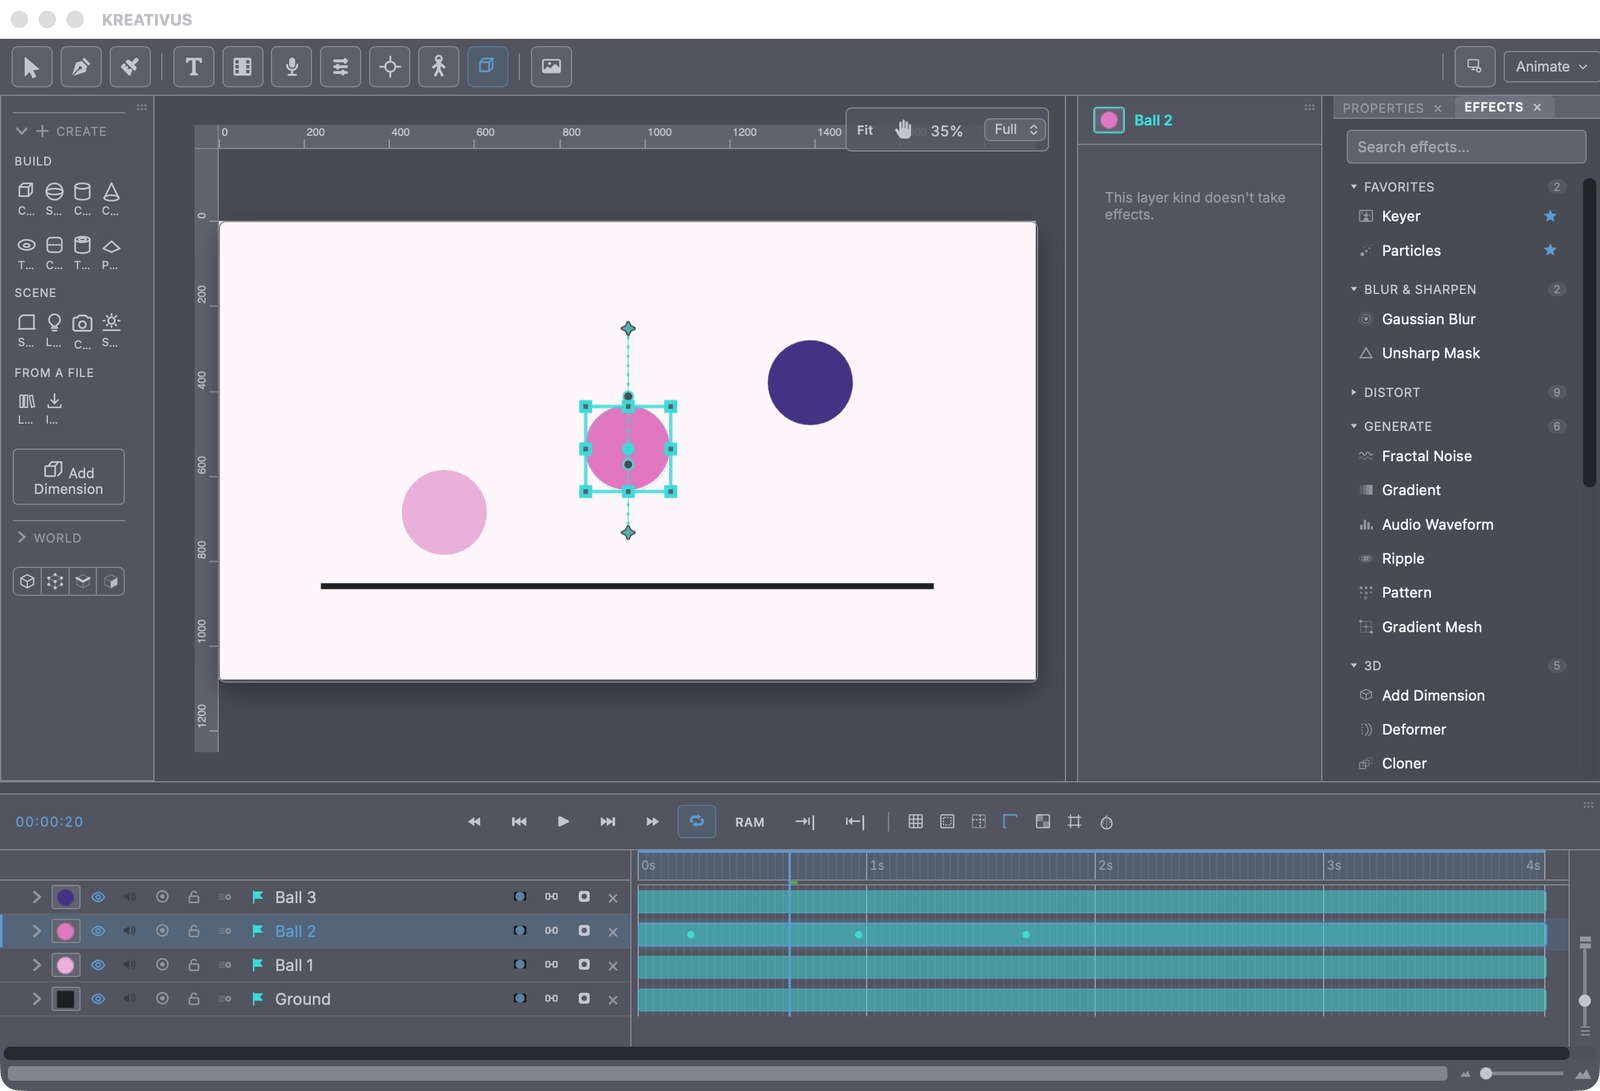
Nearly everything in Kreativus animates — transforms, colors, stroke widths, a star’s point count, every effect dial, even on/off switches. The model is After Effects’: press a property’s stopwatch to set a keyframe at the playhead, change the value at another frame, and the property tweens between them. This page is the machinery; the Animate panel is the one-click library built on top of it.
Keyframes in the timeline
Every keyframed property gets a row of 4-point star diamonds. Click selects, Shift-click extends, and a marquee drag grabs every diamond it touches. Drag to retime (a drag can never silently delete a keyframe it passes over — colliding keys swap), Alt-drag copies, Alt-click deletes. Collapsed layers show merged diamonds so nothing hides. Copy/cut/paste keyframes with the usual shortcuts — paste lands at the playhead, on whichever layer is selected, values included.
Reveal shortcuts, straight from AE: U shows every animated property on the selected layer (a second press folds it back; Shift+U sweeps a whole group), P/R/S/T reveal Position/Rotation/Scale/Opacity (Shift adds instead of replacing), L Volume, M masks.
Scroll to zoom. The wheel over the track area zooms time in and out, anchored under the pointer — the frame you’re hovering stays exactly where it is while everything scales around it, so you zoom into the bit you’re looking at rather than into the playhead. A sideways gesture still pans, and Shift+scroll goes back to scrolling a tall layer stack. The zoom slider in the footer is still there, and it anchors on the playhead, which is the right answer for a control that has no cursor of its own.
Easing
Each keyframe’s easing shapes the segment leaving it. The quick set — Linear, Ease In/Out/InOut, Hold (stays put, then snaps — stop-motion timing) — plus a library of 14 named curves (the Sine/Quad/Cubic families, Back In/Out, Anticipate, Overshoot), a full cubic-bezier editor for custom curves (y-values may leave 0–1 for real overshoot), and five favourite slots shared between the timeline’s hover popup and the panel — drag any curve onto a slot.
Diamonds tell you the easing at a glance: petals point toward the eased side, Hold is a flat step, and rows tint by easing (teal linear, amber eased, grey hold). For the real curve, every animatable row expands into a speed graph — drag the bow handle between two keys to reshape the velocity directly.
Keyframe assistants (right-click any selection of diamonds): Easy Ease (and In/Out), Toggle Hold, Reverse Keyframes (the same shape backwards), and Rove Across Time — redistributes the timing of a run of keys so each segment’s duration matches how much the value actually changes: instant even pacing. And Save as Animation Preset… turns any selected keyframes into a reusable preset — see the Animate panel.
Motion paths
Position keyframes draw their path right in the viewport — stars for keys (tinted by easing), with draggable bezier handles on every key: pull one and the movement curves. Un-dragged paths stay mathematically identical to straight lines, so curves only appear when you ask. Speed ticks — one dot per frame along the path — bunch where the motion is slow and spread where it’s fast: the only place easing is visible on a path, exactly as in AE.
Past the last keyframe — loops
Any transform (and several more) can extrapolate past its last key, per property, with three little buttons on the row:
- Loop — the span repeats forever. A walk cycle keyed once.
- Ping-pong — forward then backward, alternating. A breathe that needs no matching ends.
- Continue — carries the last segment’s velocity forever. A thrown object, a coasting pan — two keyframes, endless motion.
The shape-tween track loops and ping-pongs too. Frame layers (cel strips) carry their own Loop controls.
Switches keyframe too
A checkbox has no meaningful in-between, so a keyframed switch is a step track — it holds each value until the next key, and its keyframes read as the on/off they are (never a float stuck at “0.47”). That’s how a limb’s Flip Bend lets an elbow reverse mid-swing.
Hold on twos
Set Hold on any layer and its animation updates every n frames instead of every one — on twos, the hand-drawn standard, or threes, fours, sixes, eights. It is a layer property, sitting with the layer’s own switches, because it is not something done to the drawing: it is which frame the drawing is.
It holds the whole layer — its motion, its shape, its rig, its effects, all stepping together. Put it on a group and everything inside holds with it, which is how you put a character on twos and the background on ones.
Offset is the part After Effects can’t express. Two characters both on twos, both stepping on the even frames, move as one machine; sliding one of them a frame is what stops a scene reading as mechanical. It’s the same reason an exposure sheet staggers its levels.
The hold never touches a layer’s in and out points — a layer on twos still starts on exactly the frame you trimmed it to.
Pixel Motion Blur
There are two kinds of motion blur, and they answer different questions.
The Motion Blur switch on a layer is exact: it samples the layer’s own animation at sub-frame times, so it knows precisely where the layer was because you told it. Use it wherever it applies.
Pixel Motion Blur is for pictures whose motion the app cannot know — footage shot on a fast shutter, a rendered sequence that arrived with none, a nested comp whose insides move. There is no curve to sample, so it measures instead: dense optical flow says where every pixel came from since the frame before, and each one is smeared along its own vector.
- Shutter — the exposure’s open duration in degrees of a frame. 180° is the film standard, and it’s the same unit and the same number the layer switch uses, so the two kinds can be dialled to match.
- Samples — how many times the smear is sampled. Too few and a fast move reads as separate ghosts rather than a streak. Cost is linear, so this is the dial to drop for a preview.
- Boost — multiplies the measured motion. 100% is what the estimator actually reported; more is a look, and it’s also the honest fix for a scene where the estimator under-reads.
It costs a measurement per frame (about 80ms at working resolution) and is cached on the two frames’ content, so scrubbing back over ground you’ve covered is free. A pixel that didn’t move is left exactly as it was — a background never softens because something else in the frame is moving.
It knows about Hold: on a layer sitting on twos, it measures between the frames the layer actually struck, not between comp frames, so the steps still blur.
Time Displacement
Every pixel reads from a different frame. That’s slit-scan, time smear, the waterfall of frames — one image assembled out of many instants.
- Clock — where each pixel’s own time comes from. Brightness makes the picture eat itself: bright areas run ahead of dark ones. Top to bottom is the slit-scan classic — the bottom of the frame is half a second behind the top, and anything moving down the screen stretches into a ribbon. Left to right and Out from the centre are the same idea turned. Another layer reads that layer’s brightness.
- Spread — how many frames separate the map’s black from its white. Bipolar, so a negative spread runs the frame the other way and the bright end lags instead of leading.
- Offset — which value of the map reads as now. At 0 the effect only ever looks backwards; set it to half the spread and bright pixels run ahead of the playhead.
- Steps — how many distinct frames the spread is cut into.
A layer map is live. After Effects wants a still and makes you precompose anything else; here the map can be animated, generated, or a Depth Mask, and it’s re-read every frame. Point it at a Fractal Noise and the displacement crawls; point it at a Depth Mask and the far parts of a shot lag behind the near ones.
Every pixel comes from exactly one frame — never a blend of two. A cross-dissolve across frames turns a hard slit-scan edge into a smear of two pictures, which is what makes a bad version of this look like a mistake rather than a technique.
Steps is the cost dial, and turning it down is not a compromise. Each step is a full render of the layer at another frame, so twelve steps is twelve renders — but eight frames of ribbon still reads as a ribbon, and a low step count is also a look: the stepped, sliced version of the same effect. The renders are shared with Echo’s frame store, so scrubbing forward re-uses almost all of them.
Time Remap, Reverse and Freeze
Time Remap says which frame of its own content a layer is showing, as a keyframable curve. It has always been there for nested comps and footage; it now works on every layer kind — a drawing, a text layer, a group, a rig. After Effects can’t time-remap a shape layer at all.
For a nested comp or a clip, the curve picks a frame of the source. For anything else there is no separate source — a drawing’s content is its keyframes — so the curve picks which frame of the layer’s own animation to evaluate. Same control, and in both cases the answer to “what am I looking at”.
Right-click a layer for the three one-click recipes:
- Reverse — plays the layer backwards over its own bar.
- Freeze Frame — holds whatever is showing right now, from here on. It reads what the layer is actually showing, so freezing an already-remapped or held layer freezes the picture you can see, not the frame number under the playhead.
- Reset Time — back to natural speed; clears any of the above.
In-between decides what happens when a retime lands between two frames — the Timewarp question. It appears once a layer has a Time Remap, because with none there is nothing to land between.
- Nearest frame — show the closer real one. Free, exact, and the right answer for drawn animation: a held drawing that cross-faded into the next one would stop being drawn animation.
- Blend the two — cross-fade. Cheap, and honest about what it is: smooth on slow moves, a double exposure on fast ones.
- Flow — build the frame — measure where the pixels went and construct the frame that never existed. Smooth slow motion out of ordinary footage; the thing people buy a plugin for.
Flow costs two measurements per in-between frame, cached on the pair, which is why Nearest is the default. It’s a mode on the retime you already have rather than a separate effect with its own Speed dial — so it composes with Reverse, with Freeze, with the hold, and with any curve you’ve bent by hand. Slow a shot to 40%, ease into it, and put the whole thing on twos: all three at once, no precomposing.
None of them is a flag. Each writes a real Time Remap curve, so what happened is visible in the timeline and can be eased, trimmed or partly undone like any other animation — and you can bend a Reverse into a slow-down on the way back.
Hold and Time Remap compose, in that order: the hold quantises the comp frame, then the remap says which frame of the animation that shows. A layer at half speed on twos steps on the comp’s even frames, which is what you want; the other order steps the source and reads as a stutter.
Parenting
Drag the pick-whip (the chain icon on a timeline row) onto another layer and the child follows — position, rotation, scale and opacity composing down the chain like every compositing app. The extra: four Inherit checkboxes per child (Pos/Rot/Scale/Opac), so a layer can orbit a spinning parent while staying upright itself. Parenting never moves a layer in the stacking order.
Control layers — nulls you can see
A Control layer is an animation null that renders nothing — but draws a marker in the viewport (never in exports): 16 shapes from the classic crosshair and AE square through Axes, Target, Bone, Arrow, Compass, Star, Paw… or any typed glyph — a letter, an emoji. The marker rides the null’s full transform (a Gear visibly turns; Axes read mirroring at a glance), it’s drawn in the layer’s own label color so the timeline row and the viewport handle are one identity — and the marker is the handle: click it to select, drag it to move. Size, outline/solid and an always-show-name switch are per-null, because the whole job is telling twenty nulls apart.
The World rows
Two properties belong to the composition rather than any layer — the environment light’s Intensity and Rotation — and they get their own World rows at the bottom of the timeline, keyable with nothing selected. A slow world-rotation keyframe is how a still 3D object gets light to travel across it.
Transport, work area, RAM preview
The transport reads outward from Play: start · back a frame (,) · Space · forward (.) · end, plus loop. (Space also pans: hold it and drag the canvas. A tap plays, a drag pans — so the two never collide.) The work area bar above the ruler scopes playback and looping to a sub-range — drag its handles. RAM Preview renders every uncached frame of the work area across several background workers so playback runs full speed; the cache bar under the ruler shows exactly what’s ready (bright = RAM, dim = disk). Frame rate and duration live in File → Comp Settings — changing fps retimes playback speed, never your keyframes’ numbering.
Onion skin (up to 5 drawings each way), grid/safe-zone/guides/ruler toggles and a transparency checkerboard round out the strip. Audio-bearing layers get waveforms, a draggable volume curve, dB nudge buttons and one-click audio fades.
Recipe — a perfect ball bounce, by hand. Key Position at the top, floor, top. Select the floor key → Easy Ease is wrong here: give the falls Ease In and the rises Ease Out (gravity accelerates down, decelerates up), then pull the motion path’s handles at the floor key to a sharp V. Loop. That’s the whole exercise, and every dial of it is on this page.