Effects
Physics
Give layers a role — Solid, Obstacle, Animated — and they fall, collide and push each other in real time, obeying the comp's own Gravity.
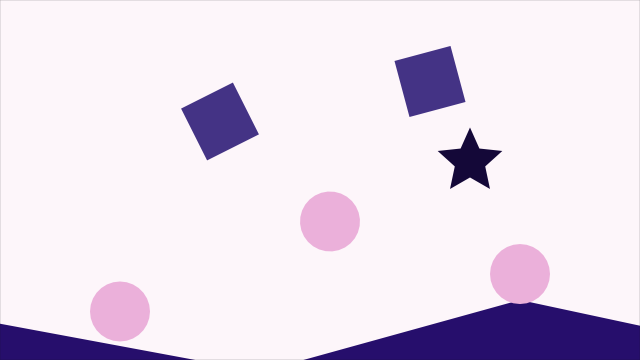
Physics is a tag, not a filter. Apply it to a layer and pick what that layer is in the simulation; from then on the layer moves on its own, live in the viewport, while everything else about it — fills, brushes, effects, masks — keeps working exactly as before.
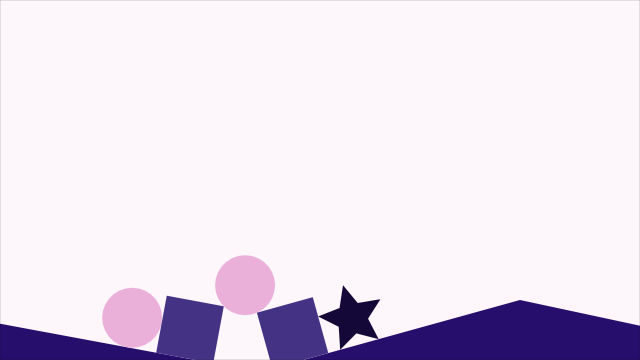
The comp is the world: one gravity, one clock, shared by every tagged layer. Drop five drawings with the Solid role over a drawn hill tagged Obstacle and they tumble down it the moment you press play.
Roles
The Role dropdown, at the top of the effect, decides everything else:
- Solid — falls & collides. A real rigid body: it drops, bounces, slides and tumbles, and it hits other Solids. Your keyframes on it are ignored while the simulation drives it (position and rotation, that is — scale stays yours).
- Obstacle — never moves. Scenery with infinite weight: floors, walls, hills, bowls. It uses the drawing’s exact outline, so a Solid rolls into a drawn cup, not across its rim.
- Animated — pushes things. Follows your keyframes and your parenting like any layer, but Solids can’t pass through it: animate a head turning and it bats a ball away; animate a platform and it carries a crate. Its outline tracks the drawing every frame — even one that’s bending through a Puppet limb.
- Rope — dangles & swings. Drawn strands become simulated hair, ropes and chains — see below.
- Magnet — pulls things. Not a body but a force: everything within its Reach is drawn toward it (negative Strength pushes away), fading to nothing at the rim. Put it on a null, animate the null, and drag debris across the frame.
A tagged group is one body. Tag a group Solid and its children’s drawings unite into a single collision shape that tumbles as a piece — a multi-layer character can be thrown whole, every part riding along rigidly.
Every role collides by what the layer visibly is — the filled shape, the brush ribbon at its drawn width, live text as real glyph outlines. A Solid’s dents are real: drop a ball into a drawn cup and it rests inside the cup, not across its rim. A bitmap layer collides by its vector mask when it has one (and the mask can be keyframed — rotoscoped collision), by its frame otherwise. The Shape dropdown trades fidelity for simplicity when you want it: Box, Circle, or Hull (the outline with its dents filled in).
Materials
The dials are per-object, and keyframable like any effect parameter:
- Bounciness — how much of a fall comes back up. 0 lands dead; 1 is a superball.
- Grip — friction. 0 slides like ice, 1 grabs like rubber.
- Density — relative heaviness; felt when bodies trade momentum.
- Gravity Scale — this object’s private gravity. 0 floats, negative rises: a balloon is just −0.1.
- Start Spin — launch rotation, in degrees per second, from the moment it goes physical.
Two switches, for Solids: Starts Asleep holds a body perfectly still until something touches it — a stack of cans that waits for the ball — and No Spin lets it slide and fall without ever rotating.
Team puts bodies on collision teams: Everyone hits everyone, while Team A, B and C pass through the other teams but still hit their own and Everyone — two crowds of debris that never tangle with each other.
The throw
A Solid’s Release setting is how you hand your animation over to physics: Physical from the start (the default), After my last keyframe, or At a frame…. Until the release the body follows your keyframes exactly, pushing anything in its way; at the release it goes physical carrying the momentum your keyframes gave it — animate a wind-up and let go, and the flight, spin included, continues at precisely the speed you were animating. A wrapped rotation is read the short way around, so a fast spin releases as a fast spin, never a backswing.
Keeping a take
Bake to keyframes freezes the current simulation, writing only as many keyframes as the motion actually needs — a whole flight fits two position keyframes with curved handles, a resting stretch fits two of everything. On a Solid it becomes ordinary position and rotation keyframes — one undo step, spin written as a smooth unwrapped curve for the graph editor. On a Rope it becomes shape keyframes, each kept frame’s curve editable like any drawn shape. The tag then switches itself off, so nothing keeps simulating underneath the bake — unless other physics layers were leaning on the baked one, in which case it stays on as Animated and keeps pushing them until the last dynamic layer is baked too. If you want a whole interacting pile frozen exactly as you saw it, bake its layers one after another in the same sitting. Use it when a take is right and you want it safe from every future edit, or to hand-bend a few frames of what physics gave you.
One sizing note: a body’s collision shape is read at the moment it spawns — keyframing a layer’s Scale mid-simulation scales the picture, not the collider.
Motion blur works on simulated layers like any other: the shutter samples the simulation between frames, so a thrown crate streaks along its real arc.
Hair, ropes and chains
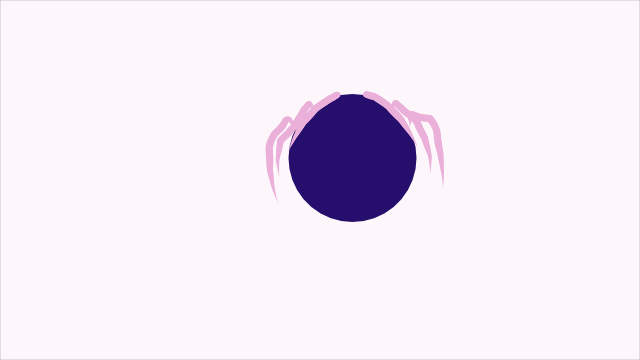
The Rope role is the reason this whole system exists: secondary motion. Draw hair strands, a scarf, an antenna or a chain as ordinary open strokes, tag the layer Rope, and parent it to whatever should carry it. (Strands drawn as separate layers tag just as fast: select them all, apply Physics once and set Role to Rope once — with several layers selected, applying and tuning both land on the whole selection.) From then on the strands swing, trail and settle on their own — animate the head, and the hair animates itself.
- Every open stroke in the layer is its own strand — a six-stroke hair layer is six ropes, colliding with the head and with each other.
- The drawn shape is the rest shape. Stiffness pulls the strand back toward the exact curve you drew, not toward “straight” — an antenna springs back to its drawn bend.
- Pin Start holds the stroke’s drawn beginning where the layer carries it (the scalp end); Pin End too makes a hanging bridge. Ropes on a thrown Solid stay attached — the root rides the body itself.
- Stiffness is drape-to-antenna; Damping is how fast swinging dies; Stretch turns rigid chain links into springs; Density and Gravity Scale work as on Solids. Segments trades smoothness for cost (Auto picks by length).
- Collide lets strands hit Obstacles, Solids and other ropes; Self Collide additionally lets one layer’s strands hit each other (off keeps dense hair calm).
- The stroke’s ink — brush width, taper, the Width tool’s shaping — bends along with it untouched.
The World rows
When any layer in the comp carries a Physics tag, the timeline grows a Physics group above the layers, beside World:
- Gravity — strength, in percent. 100 is a natural fall; keyframe it to 0 and everything goes weightless mid-shot.
- Gravity Direction — 0° pulls down; tip the whole world sideways.
- Speed — the simulation’s clock. 50% is slow-motion physics under a normal-speed camera.
- Wind and Wind Direction — a steady push on every Solid and rope; ropes catch more of it, so strands flutter first, which is exactly the point.
- Gustiness — 0 is a laminar fan; up the dial and the wind surges, lulls and wanders direction. The gusts are deterministic: scrub anywhere, export, same breeze.
All six are keyframable, and unlike the closed-form simulations (Particles, Weather), a keyframe here bends motion from that moment on — cut gravity at frame 40 and everything mid-air keeps its momentum and starts drifting.
Scrubbing, exporting, and staying real-time
The simulation is deterministic and remembered: it computes each frame once, keeps the result, and plays it back from memory. Scrub anywhere — backwards, to the end, one frame at a time — and you land on the identical result; export matches the viewport exactly. Editing anything the simulation can feel (a tagged layer, its keyframes, a World row) re-simulates in milliseconds; editing anything else doesn’t touch it. Hundreds of tagged objects stay realtime.
A long comp scrubbed cold may take a moment to catch up — the viewport shows your keyframed layout and settles into the simulated result within a second, without ever caching the in-between.
Undo works like everywhere else, with a bonus: undoing a physics change brings back the previous simulation instantly, no re-compute.