Effects
Effects
How the effects rack works — the browser, the quick-add palette, the stack, presets, and why every dial can be keyframed.
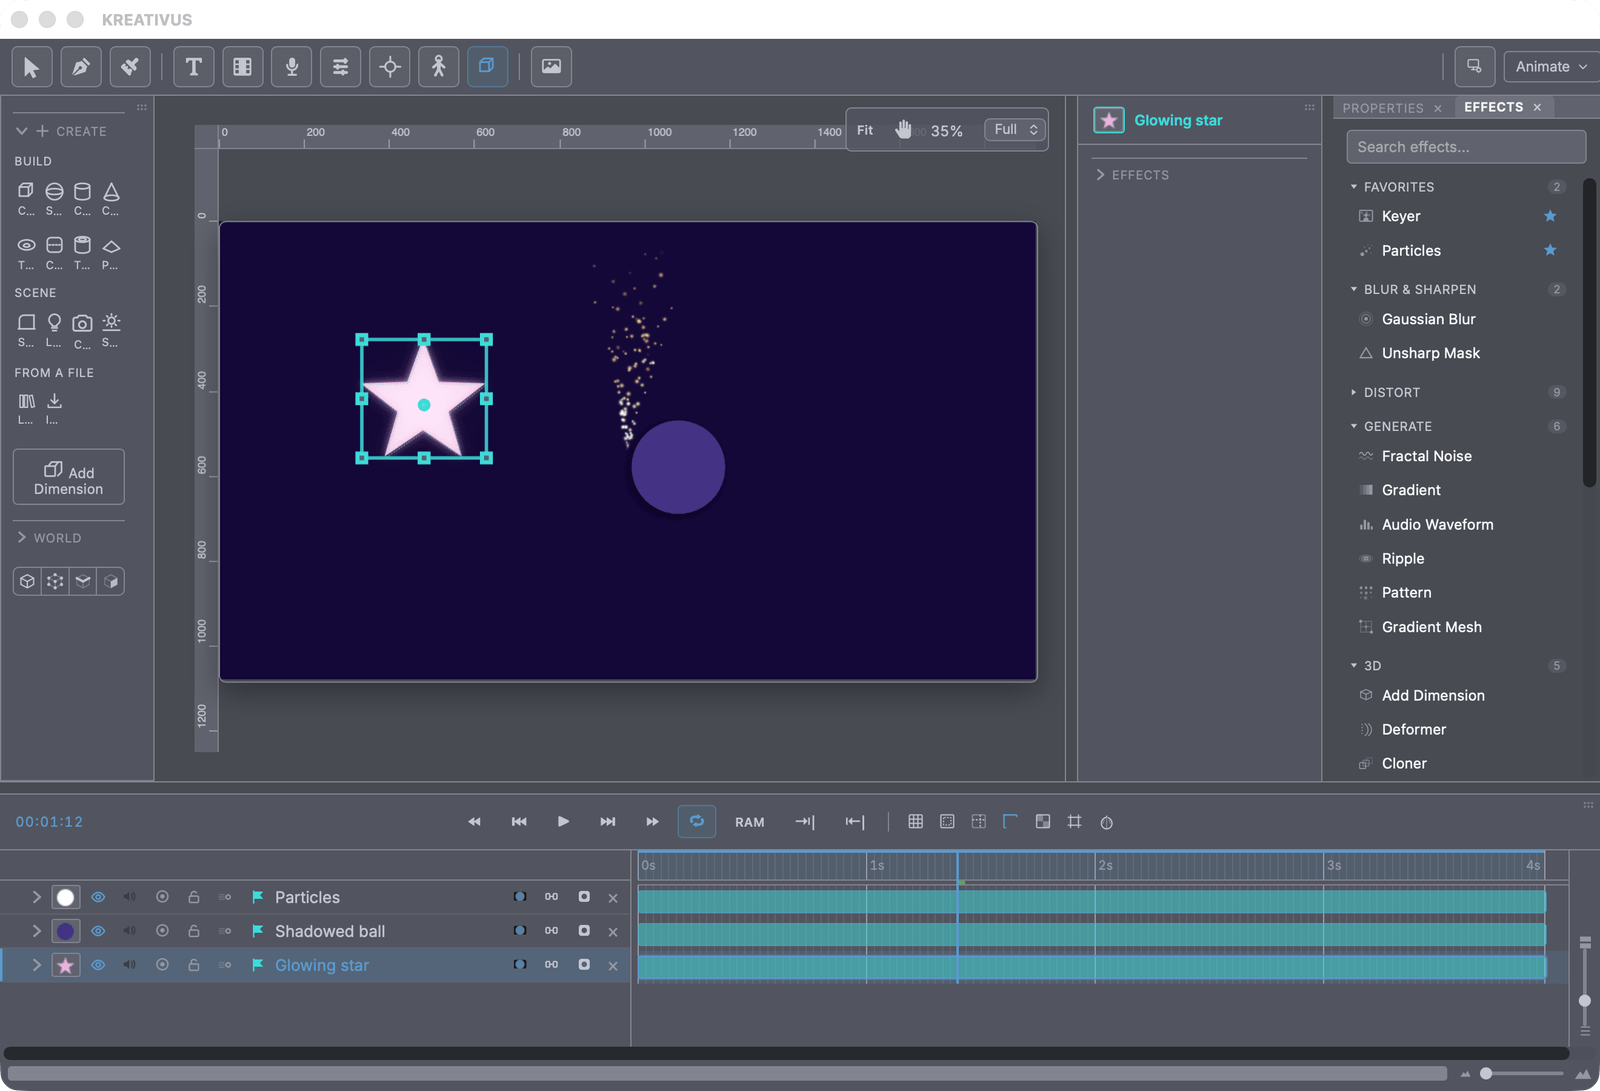
Kreativus ships a full effects rack: simulations (particles, weather, explosions), generators (patterns, gradients, noise), distortions, stylizers, and a complete color-correction suite. This page is about how the rack itself works. Each family then gets its own deep-dive page — see the map at the bottom.
Three ways to reach an effect
The Effects panel is the browsing place: every effect grouped by category, with a search box on top. Search matches more than names — keyword aliases are built in, so typing rain or fog finds Weather, track or screen finds Corner Pin. Star the ones you use daily and they collect in a Favorites group at the top. Click a row to apply it to the selected layer — every layer, if several are selected — or drag it onto one specific layer in the timeline.
Quick-add (⌘K) is for when you already know what you want: a small palette opens anywhere in the app, you type three or four letters and press Enter. It shares its search brain with the Effects panel, so anything findable in one is findable in the other.
The Effect menu in the menu bar lists the entire catalog grouped by category — the same taxonomy, guaranteed: a test in the app’s own suite fails if an effect ever exists in one place and not the other.
Several layers at once
Selection is plural, the After Effects way:
- Applying an effect with several layers selected gives it to every one of them — from the Effects panel, quick-add or the Effect menu. Twenty selected hair strands each get their own Physics tag in one click. A layer that already carries the effect is skipped rather than doubled.
- Tuning fans out too. With a multi-selection the Properties panel shows the primary (last-clicked) layer’s values, and every edit — a transform field, a fill or stroke, any effect dial, point or color, an effect’s enable switch or its remove button, a Physics role change — lands on every selected layer that has that property or effect. Layers that don’t have it are simply left alone, so mixed selections are safe.
- However many layers an edit touches, it is one undo step.
The gesture this was built for: draw six hair strands, select them all, apply Physics once, switch Role to Rope once, drag Stiffness once — the whole head of hair tunes together.
Where effects can go
Every effect knows which layers it’s for, and the app now enforces it in one place:
- In the Effects panel and quick-add, an effect that can’t work on the current selection shows greyed out, and its tooltip says why — “works on drawn vector paths only”, “works on 3D objects only”, “needs footage or a picture”, “this layer draws no picture for the effect to work on”. Select something it fits and the row wakes up. With several layers selected, a row stays live if any of them can take the effect — applying then lands only where it fits.
- A few effects are never greyed because aiming them anywhere still does something sensible: the generators (Fractal Noise, Gradient, Gradient Mesh) and Pattern make or pick their own host layer, and the Simulation effects plus Audio Waveform and Ripple create their own layer when nothing is selected.
- The same rules guard every application route — panel click, quick-add, the OS Effect menu, and drag-and-drop — so an incompatible drop simply does nothing rather than leaving a dead effect on the layer.
- The browser follows your workspace. A scoped workspace (Draw, Color…) browses only the effect shelves that belong to it — a drawing desk doesn’t shelve simulations, 3D or footage tools, and the OS Effect menu trims itself to match. Nothing is out of reach, though: type in the search box and everything answers — out-of-scope matches appear dimmed under an “In other workspaces” divider, and clicking (or dragging) one applies it exactly as it would anywhere else. Effects already applied to your layers keep their controls in every workspace.
Old projects are never punished: a file that already carries an unusual pairing still opens and renders — the whole effect x layer matrix (every offered effect on every kind of layer, including broken staging like missing footage) is exercised by the app’s own test suite, and nothing in it may crash.
The stack
Applied effects collect in a stack on the layer, shown in the Properties panel. The top of the stack applies first, then each one below runs on the result — the same convention After Effects uses, so a Glow below a Posterize glows the posterized picture, and above it, glows first and gets posterized after. Reorder by dragging; every effect has an enable toggle, so you can switch one off without losing its settings.
Effects apply per layer, but two constructions widen the reach:
- Adjustment layers — an empty layer whose effect stack applies to everything below it in the comp. One Color Grading on an adjustment layer grades the whole scene; slide it down the stack and it grades less of it.
- Group layers — effects on a group apply to the group’s composite, so a single Drop Shadow can wrap a whole multi-layer character instead of shadowing each part separately.
Every dial is a channel
Nearly every slider, angle and color in every effect is keyframable — the stopwatch next to a dial in Properties turns it into a timeline channel like any transform. Even on/off switches can be keyframed (they step, holding each value until the next key). If you can see a control, you can usually animate it.
And everything is scrub-proof: simulations are computed as a pure function of the seed and the frame number, never as a running state. Frame 200 looks identical whether you played into it, scrubbed backwards into it, or jumped straight to it from a saved file — and an export always matches the preview. That’s a design rule across the whole rack, not a per-effect feature.
Presets
Four of the big effects — Particles, Shatter, Pattern and Deconstruct — ship their own preset browsers with rendered preview strips, because for those, the presets are half the feature. The smaller effects get a lighter version: a preset dropdown at the top of their controls with a handful of named starting points. Glow, Echo, Twirl, Gaussian Blur, Noise, Tint, Posterize, Threshold, Gradient Map and Depth Mask all carry them. A preset replaces the effect’s settings from a clean slate — pressing two in a row gives you the second one, never a contaminated mix.
The map
| Family | Page | What’s in it |
|---|---|---|
| Simulation | Particles · Weather · Shatter | The physics crowd — emitters and swarms, rain, Voronoi explosions |
| Liquid | Liquid Shapes | Live vector metaballs — blobs that merge and carve like liquid |
| Generate | Pattern · Deconstruct · Generators | Pattern fields, poster grids, gradients, fractal noise, audio waveforms |
| Distort | Distort | Twirl, Bend, the warps, Mesh Warp, Corner Pin, Mirrors |
| Stylize & finish | Stylize | Glow, Drop Shadow, Echo, Noise, blur and sharpen |
| Color | Color & grading | Levels, Curves, wheels — the whole grading suite |
| Animated strokes | Animated strokes | Boil and the hand-drawn wobble family |
| 3D | 3D | Add Dimension, primitives, cloners, deformers, path motion |
| Video & AI | Video & AI | Cutout, Generative Erase, Depth Mask, the Keyer |